This hider guide covers everything you need to survive as a hider in MECCHA CHAMELEON: color matching, poses, hiding spots, movement, clone tactics, and Eeyan tricks. Good painting is only the surface. To outlast hunters, you also need to understand light, timing, and the scoring system that rewards you for being seen but not caught.
This guide is for players who want to go from "I painted myself brown and hid in a corner" to "I looked like a piece of furniture for a full minute while a hunter walked past me twice."
1. What Being a Hider Actually Means
As a hider, your goal is not always to be invisible. Your goal is to be unrecognizable. A hider who is plainly visible but looks like a normal part of the map is usually safer than a hider tucked behind a wall but painted the wrong color.
The best hiders think about four things at once:
- Color: Do I match the surface I am pressed against?
- Light: Is my paint too bright or too dark for the light hitting me?
- Shape: Does my body look like the object or angle I am imitating?
- Behavior: Am I still, in a good spot, and ready to move if needed?
If you get all four right, you do not need a perfect hiding spot. You can hide in plain sight.
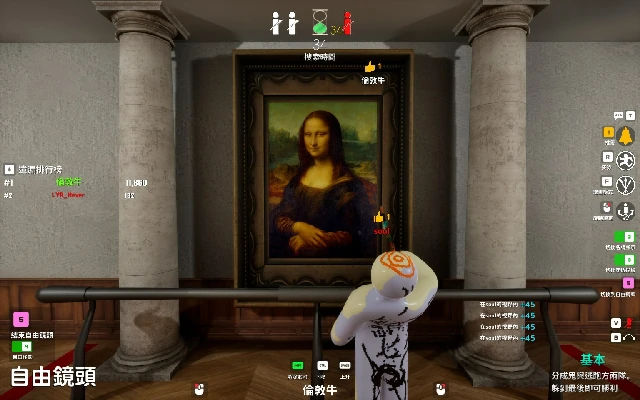
2. Painting Basics: The Eyedropper Is Only the Start
The paint system is the core of MECCHA CHAMELEON. Learning it fast is the first skill every hider needs.
How to Use the Eyedropper
The eyedropper lets you sample a color from the environment. Open the paint palette and click the eyedropper icon on the right side. Then click the wall, floor, or object you want to match. This gives you a base color to paint with.
But the eyedropper is not enough. The color it samples is the raw surface color. It does not account for shadow, angle, or the fact that your body may cross multiple surfaces. Treat it as a starting point, not the final paint job.
Adjust Color After Sampling
Once you have the base color, you usually need to adjust it:
- Go darker if you are in a shadow.
- Go lighter if direct light is hitting you.
- Shift the hue slightly to match the camera angle, not the object itself.
- Use multiple colors if your body is against more than one surface.
Players who sample one color and stop painting are easy to spot. The best hiders layer colors.
Resize the Brush for Speed
You can change the brush size by holding the right mouse button and moving left or right. In the final seconds before hunters come out, use the largest brush size you can. Cover the biggest parts of your body first. You can clean up the edges and small details after you are hidden.
Paint Order for Fast Camouflage
When time is short, follow this order:
- Torso and back: the largest visible surface.
- Legs and arms: the next largest surfaces hunters will see.
- Head and hands: small but often the first thing that gives you away.
- Feet and edges: finish these while waiting in your spot.
If you can get the torso, arms, and legs covered before the timer ends, you are already hard to spot from a distance. Details can come later.
Common Painting Mistakes
- Painting only the front and forgetting the back and sides.
- Sampling a wall color but ignoring the floor color where your legs are.
- Using one flat color when the environment has multiple tones.
- Racing to finish before the timer runs out and leaving hands or feet unpainted.
- Forgetting that your paint still looks different under different lighting.
- Sampling a color from a bright area and then hiding in a shadow with it.
- Not repainting after moving to a new spot.
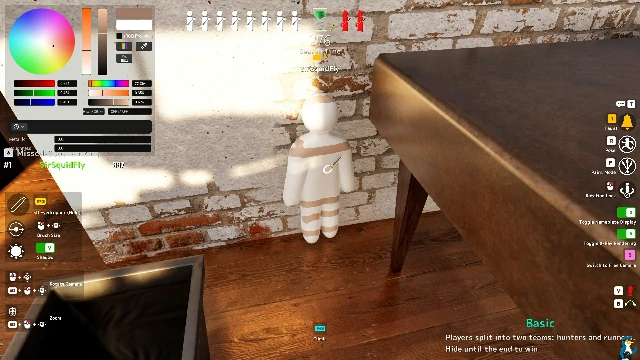
3. Poses: Make Your Body Stop Looking Like a Person
Your pose changes what parts of your body are visible and how your silhouette reads. The right pose can make a bad color work. The wrong pose can make perfect paint look obvious.
How to Use the Pose System
Press and hold the R key to open the pose wheel. Move your mouse toward the pose you want. When it is highlighted in blue, release R and your character will hold the pose. You can right-click or left-click to switch between pose wheels.
As of the June 23 update, there are eleven poses available. Each one changes your body shape and the surfaces you need to paint.
Strong Poses for Hiding
| Pose | Why It Works | Best On |
|---|---|---|
| Curl-Up | Turns your body into a smooth rounded shape. Limbs are hidden. | Indoor Country, small props, tight spots |
| Backbend | Lets your body arch over objects without being fully concealed. | Sugar Land, Backrooms, on top of items |
| Slanted | Angles your body to match ladders, roofs, or tilted surfaces. | Ceiling spots, ladders, slanted props |
| Crouched | Reduces height and works well under objects or in clutter. | Most maps, especially visual-noise maps |
| Lying Flat | Best for ground textures, floors, carpets, and large flat areas. | Backrooms, Sewer, Sugar Land |
| Sitting | Useful for chairs, benches, plushie piles, and ledges. | Mansion, Penguin Hotel |
| Arms Raised / Contorted | Breaks the human silhouette. | Anywhere you need to look less like a person |
How to Choose a Pose
Pick your pose before you paint. Ask yourself:
- What shape am I trying to imitate?
- What surfaces will be visible from the hunter's likely path?
- Can my pose hide my limbs or break my silhouette?
- Does my pose leave my head or hands in a place that is hard to match?
A pose that looks silly in the lobby can look perfect when pressed against the right object.
Pose-Specific Tips
- Curl-Up: Paint the back and butt as one smooth color. This pose is great when you want to look like a ball, pumpkin, or plushie.
- Backbend: Use it on flat horizontal surfaces like tables, cakes, or counters. The arched shape looks like a decoration.
- Slanted: Match the angle of the ladder or roof. This pose removes the "floating person" look.
- Crouched: Tuck your head down and hide behind low objects. It is the safest pose for beginners.
- Lying Flat: Match the floor or ground texture. This pose turns your body into a flat patch of color.
- Sitting: Blend into chairs, benches, or piles of objects. Works best when you match the object behind you.
Common Pose Mistakes
- Standing straight against a wall. This is the most obvious silhouette in the game.
- Choosing a pose that leaves your head floating in open space.
- Forgetting to paint parts of your body that the pose exposes.
- Moving after the pose is set, which breaks the illusion.
- Picking a pose that does not fit the hiding spot. A curled-up pose on a ladder looks strange.
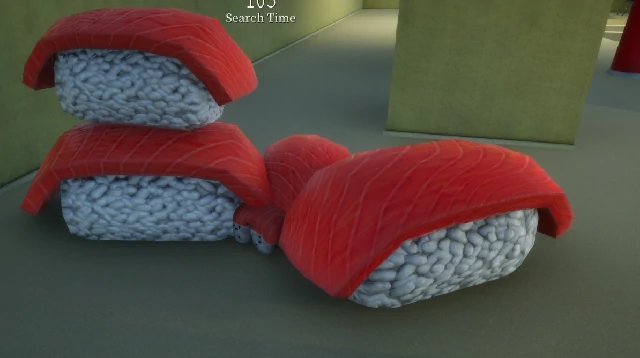
4. Light and Shadow: Let the Environment Hide You
Light is one of the most powerful tools in MECCHA CHAMELEON. A hider who understands light can survive with rough paint. A hider who ignores light will be spotted even with perfect paint.
Shadow Is Your Best Friend
Shadows break up your silhouette and forgive imperfect colors. If you place yourself in a shadow, go slightly darker than the wall color you sampled. A hunter's eye will read you as part of the dark patch rather than as a separate object.
This is especially important on maps like Sewer and Backrooms, where lighting is uneven. A spot that looks bad in bright light can look perfect in a shadow.
Avoid Flat, Even Light
The worst light for a hider is bright, uniform light with no shadows. In those conditions, every color and edge is visible. Sugar Land is the clearest example. On bright maps, you need to either match a large object perfectly or find an angle that breaks your shape.
Use Light Direction
Look at where the light is coming from. If light is hitting your left side, your left side should be brighter. If your right side is in shadow, it should be darker. A body that is lit evenly while the environment is not will stand out.
High-Contrast vs. Low-Contrast Spots
| Spot Type | Risk | Reward |
|---|---|---|
| High-contrast shadow edge | You can look wrong if the light shifts | Great for breaking silhouette |
| Full shadow | Very forgiving color | May not give Missed Points |
| Even bright light | Color must be perfect | Easy to read from hunter's view |
| Partial shadow | Best balance of safety and visibility | Good for Missed Points |
Common Light Mistakes
- Hiding in a bright spot and wondering why the color looks off.
- Sampling a wall color from a lit area, then hiding in a shadow with it.
- Ignoring that your own body may cast a small shadow on the floor or wall.
- Standing where the hunter's flashlight or game light will catch you.
- Not checking how the spot looks from the hunter's camera angle.
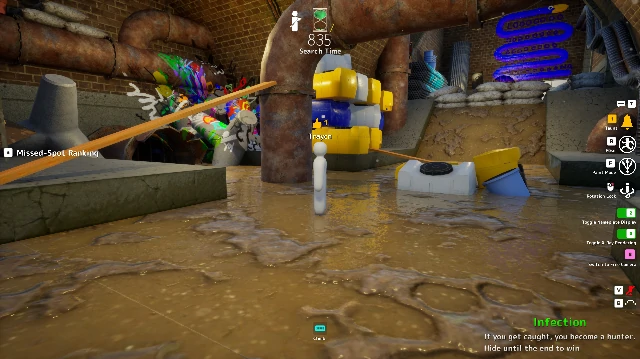
5. Object Mimicry: Become Part of the Map
The highest-level hiders do not just hide. They disguise themselves as objects. A chair, a pumpkin, a piece of meat, a balloon, a book, or a trash bag are all things a player can look like.
What Makes Object Mimicry Work
Three things matter:
- Shape: Your pose must match the object. A curled-up player can look like a pumpkin. A flat player on a cake can look like a strawberry.
- Color: You must match the object's colors, not the wall behind it.
- Position: You must be where the object is expected to be. A strawberry on a cake makes sense. A strawberry on the floor does not.
Examples of Good Mimicry
- In the Hide-and-Seek Mansion kitchen, paint yourself to match a poster or a piece of meat.
- In the birthday-party hallway, disguise yourself as a balloon.
- In Indoor Country, paint yourself like a cow standee or a pumpkin.
- In Penguin Hotel, sit among the plushies so you look like one of them.
- In Sugar Land, lie on the white cake as a strawberry decoration.
- In the Backrooms, press against trash piles so you look like another piece of clutter.
- In Osaka, paint yourself to match a trash bag or crate.
Object Mimicry vs. Wall Hiding
Wall hiding is reliable but boring. Object mimicry is risky but can survive longer because hunters may walk right past you without checking. If you want to rank high on the Missed Point Ranking, object mimicry is the best path.
When Mimicry Fails
- The object is too small or too large for your body.
- The hunter knows the map and remembers that object should not be there.
- You picked an object that is unique and draws attention.
- Your pose does not actually match the shape of the object.
6. Height and Angles: Players Do Not Look Up
One of the oldest rules in hide-and-seek games is true in MECCHA CHAMELEON: most players do not look up. Ceiling lips, beams, signs, and upper floors are some of the strongest hiding spots.
Why Height Works
Hunters usually scan at eye level first. They check corners, furniture, and floor clutter. A body above them is outside their natural search pattern. Even if they do look up, the angle often makes the hider harder to read.
Best Height Spots
- Ceiling lips and beams in the Mansion ballroom.
- Signs above the street in Osaka.
- The cloud area in Indoor Country.
- Ladders and roof edges where the slanted pose fits.
- Candy-house roofs in Sugar Land.
- Upper-floor railings and balconies in Penguin Hotel.
Use Angles to Break Your Shape
Even on the ground, angles help. Pressing yourself against a pillar, a wall lip, or a slanted surface makes your body look like part of the architecture. The goal is to make the hunter's brain classify you as "environment" instead of "player."
Height Risks
- Some spots require a specific pose to avoid looking like a floating person.
- Falling from a height can reveal your position.
- Hunters who know the map will check popular high spots.
- You may be visible from below if your underside is not painted.
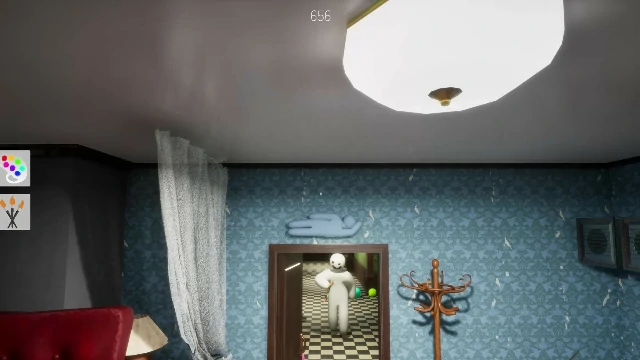
7. Movement: When to Stay Still and When to Relocate
Moving is one of the scariest things a hider can do, but it is also one of the most powerful. A good relocation can save a round that is already lost.
When to Stay Still
- The hunter is far away.
- You are in a strong spot with good cover.
- The timer is running low and you only need to survive a few more seconds.
- You are already earning Missed Point Ranking points from a hunter nearby.
- The hunter has just looked past you and is moving away.
When to Move
- A hunter is getting close and has no reason to leave.
- You have a second, better spot already planned.
- Your current spot has a weak side that the hunter is about to approach.
- You have been spotted and need to reset.
- Forced Taunt has just happened and hunters are converging.
- Your current spot is not giving you any Missed Points and the timer is still long.
How to Move Safely
Moving only works if you can do it quietly and repaint quickly. Before you move:
- Pick your destination from where you are.
- Wait for the hunter to look away.
- Move quickly but not recklessly.
- Repaint the moment you reach the new spot.
- Choose a pose that matches the new location.
If you are moving because you were seen, do not run in a straight line. Break line of sight behind a wall or object, then re-hide.
Moving Builds Skill
Moving while the round is active is advanced. Beginners should practice in private servers first. Once you can repaint in a few seconds, relocation becomes a real option.
Common Movement Mistakes
- Moving without a destination in mind.
- Running while still unpainted.
- Moving in the hunter's direct line of sight.
- Relocating to a spot that is too similar to the first one.
- Forgetting to change pose and color for the new location.
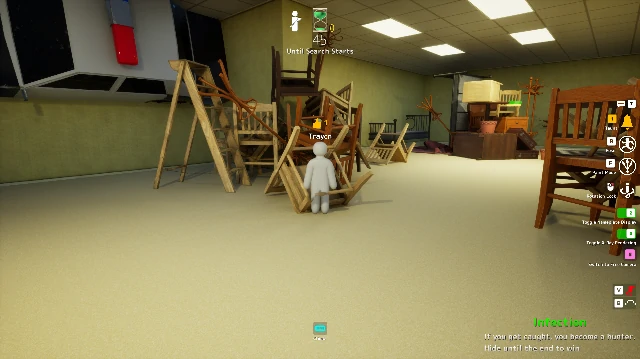
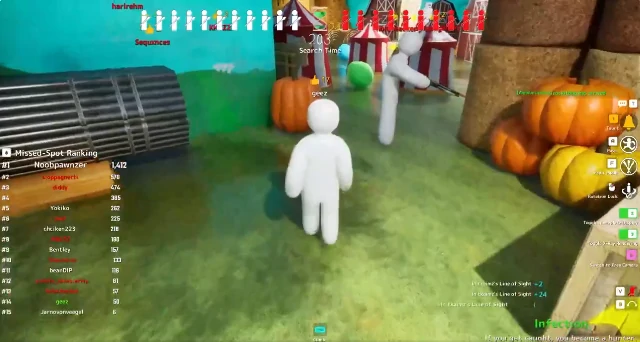
8. The Missed Point Ranking: Hide in Plain Sight
MECCHA CHAMELEON does not just reward survival. It rewards being seen but not noticed. This is the Missed Point Ranking system.
How It Works
Every time a hunter looks at you but fails to spot you, you gain points. The longer you stay in a hunter's line of sight without being caught, the more points you get. This is why hiding in plain sight is often better than hiding in a deep corner.
The ranking only updates for hunters every 30 seconds. This means hunters cannot use the score to triangulate your position in real time. If you are hiding well, you can rack up points before anyone realizes what is happening.
How to Farm Missed Points
- Pick a spot on a common walking path.
- Make sure you are visible from the hunter's main route.
- Blend well enough that the hunter does not stop.
- Avoid twitching, moving, or doing anything that breaks the illusion.
- Use object mimicry so the hunter's brain skips over you.
- Choose a spot where the hunter's peripheral vision catches you but their focus does not.
Risk vs. Reward
The exposed-spot strategy is high risk. If the hunter is careful, you will be caught. But if the hunter is rushing, you can earn a huge score and survive. It is the most satisfying way to play.
Missed Points and Winning
Remember that the final goal is still to be the last hider alive. A high Missed Point Ranking does not matter if you get caught. The best players balance exposure with safety. They pick spots that are visible but not obvious.
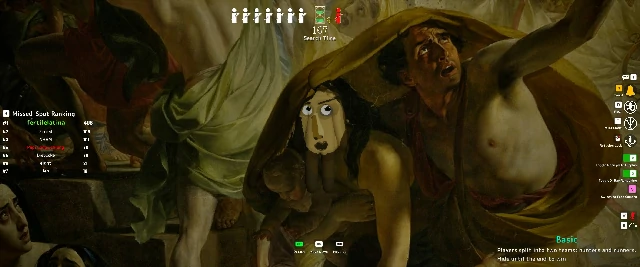
9. Clones: Your Deception Toolbox
Clones are one of the most advanced tools for hiders. They let you create copies of yourself that can earn points, distract hunters, or disguise your real position.
How to Create and Control Clones
- Press Q to create a clone. Your clone copies your current paint and pose.
- Press X to delete all your clones instantly.
- You can have up to two clones active at a time, for a total of three characters including yourself.
- Each clone has a 30-second cooldown. There are green diamond icons on your HUD showing when you can use it again.
Important Clone Rules
- Your clones are linked to your survival. If a hunter shoots any of your clones, you are eliminated.
- You can stand inside your own clones without triggering the game's red warning effect. This lets you stack clones or create unusual shapes.
- Clones ignore gravity. If you jump before creating one, it will float in the air.
- Clones count toward your Missed Point Ranking.
Good Clone Strategies
- Place a clone in a distracting spot while you hide somewhere else.
- Use a floating clone to create a decoy in an unexpected location.
- Stack clones to look like a single large object.
- Use clones to test if a hunter is checking common spots.
- Place a clone in plain sight to earn Missed Points while you hide safely.
Clone Risks
Clones are also weaknesses. A clone in an obvious spot can get you killed. A bad clone tells the hunter that a player is nearby. Use them carefully, and be ready to delete them with X if a hunter starts shooting.
Double Mode and Clones
In Double Mode, everyone starts as a hider and then becomes a hunter. Clones make you easier to find because each clone is another potential target. Hunters only need to find one version of you. Once one is found, the other clones disappear for that hunter. In this mode, clone placement is even riskier than usual.
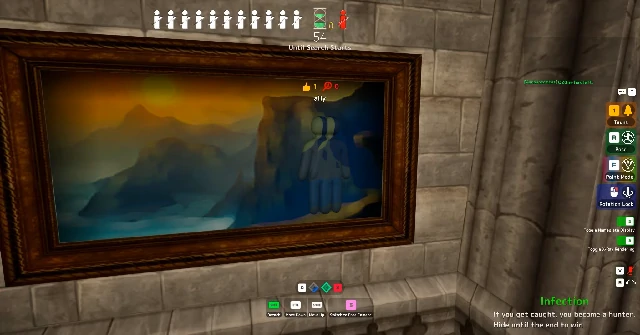
10. Free Camera and Information
After the hiding phase, you can use the free camera to watch the round unfold.
- Press 5 to enter free camera mode.
- Press 4 to free roam instead of following a hunter.
- Use it to learn where hunters check first, how they move, and what spots they ignore.
You cannot delete clones while in free camera mode, so plan ahead. Free camera is mainly a learning tool. It helps you understand hunter behavior so your next hiding spot is better.
What to Watch in Free Camera
- Which paths hunters take first.
- Which spots they ignore.
- How long they spend in each area.
- Whether they look up or not.
- How they react to Forced Taunt.
This information is useful for both you and your teammates. If you are playing with friends, share what you see.
11. Filters and Lobby Settings
The host can apply filters in the map configuration that change how the game looks. These are optional, but they affect hiding:
| Filter | Effect | Hiding Impact |
|---|---|---|
| Monochrome | Black and white | Color-based camouflage becomes harder to judge |
| Horror | Extra highlights and shadows | Shadows become more dramatic; dark spots are stronger |
| Mosaic | Pixelated view | Details blur together, which can help or hurt depending on the spot |
You can mix filters. These are mostly for fun, but they can shift which hiding strategies work best.
Choosing Filter Combinations
- Monochrome + Horror: Hard for hunters to judge color and shadow. Good for dark spots.
- Mosaic alone: Helps cluttered spots because edges blur. Hurts clean color-block spots.
- All three: Chaos. Fun for friend groups, but hard to play seriously.
Lobby Settings for Hiders
If you are hosting a private lobby, consider these settings:
- Longer painting time: Helps new hiders finish their paint job.
- Longer hunting time: Gives hunters more time to search, which rewards better hiding.
- Shorter Forced Taunt interval: Makes it harder for hiders to sit still.
- More starting hunters: In Infection Mode, faster infection means less time for hiders to set up.
12. Forced Taunt and How to Survive It
Forced Taunt is a lobby setting that makes every hider automatically whistle at set intervals. It helps hunters locate hiders in large lobbies.
How to Handle Taunts
- If you are in a strong spot, stay still. The sound reveals a general area, not your exact position.
- If you are in a weak spot, use the taunt noise as a signal to relocate.
- After a taunt, hunters often converge. Be ready to move before they arrive.
- In private lobbies, you can adjust the taunt interval and hunt duration to suit your group.
Taunt Timing
Listen to when the taunt happens. If the hunter is close and the next taunt is soon, you may need to move now. If the hunter is far away, you might have time to stay and earn more points.
Using Taunt as a Weapon
A taunt can also be a distraction. If one teammate taunts in a loud area, the hunter may move toward them and away from you. In team play, you can coordinate who is the bait.
13. Team Combos and Psychological Play
When you are not the only hider, you can work with teammates.
Team Strategies
- Bait and switch: One player hides in an obvious spot to draw hunters. Another player hides in the now-ignored area.
- Color matching: Two players match the same object so the hunter cannot tell them apart.
- Clone coordination: One player uses clones to create fake hiders while teammates hide in unexpected spots.
- Audio distraction: If one player is forced to taunt, others can use the noise as cover to move.
- Area denial: Two players hide in the same room. If one is found, the other is still safe because the hunter thinks the room is cleared.
Psychological Play
Good hiders think like hunters. If you know a hunter will check the ceiling first, hide on the floor. If you know they will clear the floor, hide high. The goal is to be one step ahead of the expected search path.
Reading the Hunter
Watch how the hunter behaves:
- Do they move fast or slow?
- Do they look up?
- Do they check corners first or open areas?
- Do they shoot at suspicious shapes or only when they are sure?
Each hunter has a pattern. The faster you read it, the better you can adapt.
14. Common Hider Mistakes
- Relying only on the eyedropper. It gives you a base color, not the right color.
- Painting too slowly. Cover large areas first, then refine.
- Ignoring light and shadow. A perfectly sampled color can still look wrong in the wrong light.
- Standing straight. It is the most obvious silhouette.
- Hiding too deep. You survive but earn no points.
- Hiding in the same spot every round. Friends will learn.
- Moving without a plan. Relocation only works if you know where you are going.
- Forgetting about clones. They are powerful, but they can also get you killed.
- Panicking after a taunt. Sometimes the best move is to stay still.
- Not using free camera to learn. Every death is a lesson.
- Ignoring the back of the body. Hunters can see you from behind.
- Choosing an object that does not exist on the map. Mimicry only works if the object belongs there.
- Overpainting details before covering the body. Big surfaces matter more than small details.
- Not adapting to the hunter. If the hunter is careful, exposed spots are dangerous.
- Forgetting to have fun. It is a party game. Experiment.
15. FAQ
How do I get better at painting fast?
Practice with the largest brush size first. Cover your torso, legs, and arms. Then switch to a smaller brush for hands, feet, and edges.
What is the best pose?
There is no single best pose. Curl-Up is great for tight spots and props. Backbend works on top of objects. Slanted helps with ladders and angled surfaces. Choose the pose that matches your spot.
Why do I get caught even when my color matches?
Probably because of light, silhouette, or position. Your color might match the wall but not the shadow. Or your body shape might still look like a person.
What is the Missed Point Ranking?
It is a scoring system that rewards you for being in a hunter's line of sight without being noticed. Hiding in plain sight earns more points than hiding in a corner.
Should I move if a hunter is near?
Only if you have a better spot and can repaint before they see you. If your current spot is strong, staying still is usually safer.
How do clones work?
Press Q to create a clone of yourself. You can have up to two active clones. Clones share your life, so if one is shot, you are eliminated. Press X to delete all clones.
Can I use the free camera while hiding?
Yes, after the round starts. Press 5 to enter free camera and follow hunters, or press 4 to free roam.
What is the best spot type?
The best spot depends on the map, your skill level, and how bold you want to be. A mix of object mimicry, height, and partial exposure usually works best.
Do filters change how I should hide?
Yes. Monochrome makes color harder to judge. Horror makes shadows stronger. Mosaic blurs details. Mix them to change the hiding meta.
What should I do when Forced Taunt happens?
If you are safe, stay still. If you are exposed or the hunter is close, use the taunt as a signal to relocate.
How do I practice advanced hiding?
Create a private server and explore the map alone. Test poses, colors, and lighting without pressure.
16. Where to Go Next
- Need map-specific spots? Read the Maps and Hiding Spots Guide.
- Want to understand lobbies, modes, and friend play? Read the Multiplayer Guide and the Game Modes and Lobby Settings Guide.
- Want to catch more hiders? Read the Hunter Guide.
- Want to understand clones, Eeyan, Forced Taunt, and other mechanics? Read the Mechanics Explained Guide.
Where to go next